Most orders for IN STOCK items placed by 12PM CST M-F ship SAME DAY. Orders for custom items and prints may take additional time to process.
If you have an original arcade machine, it may have a mechanical (sometimes called spinning) hard drive inside it. If it hasn’t happened already, these mechanical arcade hard drives will eventually fail. When this happens you will lose all of your game software and your arcade game will essential become a brick, unable to be used.
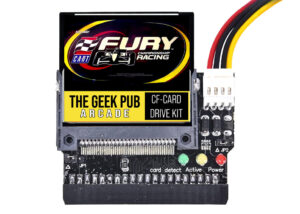
The solution is to replace your arcade hard drive with an upgraded solid-state drive. Depending on which arcade game you have, this could be a CF-Card plugged into a CF to IDE adapter, or it could be an SSD drive if your game uses a SATA style mechanical drive.
Upgrading/replacing your mechanical drive will add years of life to your arcade machine, or repair it if it has already failed.
There are two main ways to go about this replacement:

If you’re not technical, and/or your hard disk has already failed, the best approach is to simply buy a replacement solid-state drive from a reputable vendor. We offer both arcade CF-Card kits and SSD kits.
We take all of the work out of it. We image the replacement arcade hard drives for you at no charge, ready to plug into your vintage arcade machine and bring it back to life. All of our kits are pre-tested before shipping to make sure you’ll have a hassle free installation experience.
We offer imaging for many of your favorite arcades, including San Francisco Rush, CarnEvil, Cart Fury Racing, Hydro Thunder and many more. Just select the game you need and we’ll get the kit to you promptly.
If you’re on the technical side and your existing arcade hard drive has not failed, you can probably image it yourself using some hardware and software tools:

You’ll need to remove the game’s arcade hard drive from its cabinet and plug it into your PC directly or through an adapter.
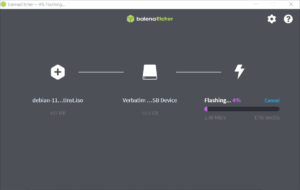
Open Balena Etcher and choose to make an image of the hard disk and save it to a file on your PC or Mac. Once the image is created, open Etcher again select the file you just created as your source, and the destination as your CF-card and write the image out.
Once the image is written you can plug the CF-card into the CF-card to IDE adapter and plug that kit into your arcade game board or PC. Be sure to plug the 5V power connect to the power connector that the original arcade hard drive was plugged into.
The game should boot up normally! If it doesn’t boot the most common reason is plugging the adapter in backwards (warning, this may damage your adapter and/or your game board!). The second most common reason is failure to plug in the 5V power cable.
If you like our content maybe consider upgrading to Premium. You’ll get access to