Most orders for IN STOCK items placed by 12PM CST M-F ship SAME DAY. Orders for custom items and prints may take additional time to process.
Unlike the original series flip open communicator used by Captain Kirk and crew, the Next Generation version worked by ressing the federation logo to activate the communicator. The communicator also worked as a visual identifier on the uniform that you were a Star Fleet member.
I used my X-Carve by Inventables (a CNC machine) to cut the basic shapes out for my Star Trek Comm Badges. If you don’t have a CNC you can easily cut these on a band saw or a scroll saw. If you do that, follow the same process as below, but print them out and glue your paper templates to the wood.
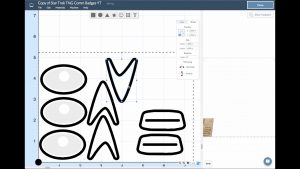 Step 1: Design the Star Trek Comm Badges
I designed my Star Trek Comm Badges in Easel. Easel is a free design program that works with the X-Carve and other Arduino controlled CNC machines (like the Shapeoko or Carvey). It works very much like many paint programs you might have used. The only difference is that instead of adding color, your add a depth to each line you draw. This allows you to carve the material in three dimensions. The darker the line, the deeper the end-mill will cut into the material.
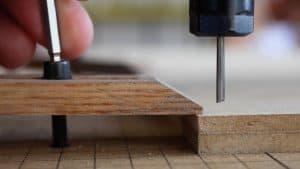 Step 2: Secure the Material
Probably the most important thing you’ll need to do before you do anything else is secure the material you’re going to be milling. Injury or damage to your tools are likely if the material comes free during the milling process. Do not skip this step!
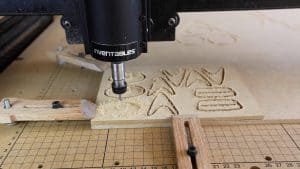 Step 3: Execute the Carve
If you’re using a CNC to make these, just click carve in the upper right corner of the screen and sit back while the X-Carve does all of the work.
If you’re doing this by hand, glue a paper template to the material and follow the lines on your bandsaw or scroll saw.
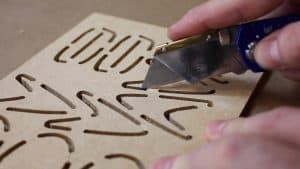 Step 4: Cut the Tabs
Easel by default leaves very thin tabs holding the material in place. You’ll need to use a razor knife to cut them free. This only takes a second. Without these tabs the comm badges could come free during the milling process and get jammed into the spindle, either ruining them or spinning them across the room at dangerous speeds.
 Step 5: Sand Everything Smooth
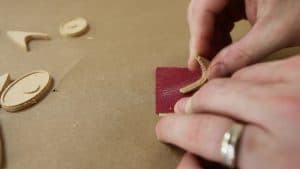
Everything should come off the the CNC (or bandsaw) decently smooth, but a little 100 grit sandpaper will remove any burs or jaggies left by the process. Some bandsaw blades tend to leave ridges too, so this will remove those.
 Step 6: Paint the Star Trek Comm Badges
There were lots of variations of colors for the Star Trek: The Next Generation and Star Trek: Voyager comm badges. The most common from what I can tell seems to be a chrome sliver Federation logo on top of a gold communicator. If you’re not looking to be exact to Star Trek canon, feel free to use whatever colors feel good. I almost painted one Black and Yellow Geek Pub colors!
 Step 7: Glue the Comm Badges to the Emblems
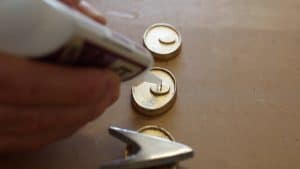
I used CA glue to attach the comm badges to the emblems. Just one little dab is all you’ll need. You can see now why we needed to leave that one little section full height. Once the glue dries, just add a little double-sided tape to the back and you stick them to your shirt or anywhere else.
 Step 8: Finished
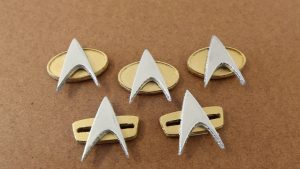
That’s it. Your all finished!
The finished comm badges look pretty neat. But they didn’t turn out perfect. You can see in the close ups there are some jagged edges. I’m not sure if this is an adjustment problem with the X-Carve or the bad quality of the MDF that I used, because even during sanding it seemed to get more rough rather then smoother. Read on if you want to learn about my other tests with aluminum and brass.
 Making the Comm Badges from Metal
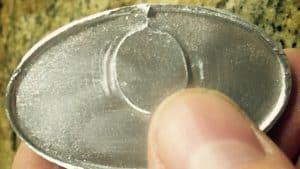
When I started this project, I originally intended to make them out of aluminum and brass, then polish them on a buffing wheel. However, I was unable to get them to come out correctly. I think I need a different bit for the X-Carve. In the future, I may revisit or update this project with the results.
My bit kept deflecting and wandering into areas it wasn’t supposed to go. I tried many different combinations of feed rate and depth-per-pass. The only thing left to try is a different bit. If you have any ideas, please leave me a comment below.
Mike here. One to beam up.
So the first thing I did was just go into Easel and I just wanted to draw some Federation looking shapes. And I picked a couple of different styles. And then just made some copies of them.
OK. So when the machine finishes all of the components are still connected to the waste-board with tabs. This is to prevent them from coming loose and getting damaged by the spindle. And we’re just going to use a razor knife to cut them loose.
OK. So I have two different colors of paint here. I have some chrome paint and I have some gold paint. I’m going to paint the Federation emblem with the chrome paint and the gold paint I am going to use to paint the comm badge.
OK. I’m just going to hold them together with a little dab of CA glue. And now you can see why we needed that raised section on this one specific one.
OK. So I’m just going to add some double sided tape to the back and this will allow me to stick them to things.
Well alright this was a lot of fun. I was originally going to make these from aluminum and brass. And for whatever reason I just could not get the X-Carve to cooperate and I think its the bit that I am using and so I’ve ordered another bit and I’ll probably try this again. You can see some pictures on my blog of some things that didn’t work at TheGeekPub.com. I then made a prototype out of wood and then thought “Well this actually doesn’t look that bad.”, so I went ahead and made a few. And they’re not perfect. There’s a few problems and some things I would do different (and we’ll talk about those in the blog article as well). But they turned out pretty well and I kind of like them. And so if you want one, I’m going to mail out two of them. So if you will go onto TheGeekPub.com and click the contact section. Drop me a like with your name and your email address. If you’re one of the first two I will send you one.
Alright guys! Well I hope you enjoyed this video. If you liked it please hit the subscribe button, and if you want to follow me as I go through these builds follow me on Instagram or over at Facebook. And that is Instagram.com/TheGeekPub or Facebook.com/TheGeekPub. See you there!
If you like our content maybe consider upgrading to Premium. You’ll get access to
8 Responses
I need to get an X-Carve… Not sure what I’d use it for, but I guess I’d just have to make stuff up. 😀
I would love one of these!
Looks great. would love one.
I watch alot of your stuff particularly fond of these badges 🙂
I’m planning to redo this video in the future and make them out of aluminum. When I do I’ll send you one.
LOVED THE STAR TREK BADGE. YOU DO GREAT WORK. ENJOYED WATCHING YOUR VIDEOS.
Can’t download the SVG file anywhere? In the description of your YT video you said you’d link them here?
They’re provided free on Easel at the Instructables website.