Most orders for IN STOCK items placed by 12PM CST M-F ship SAME DAY. Orders for custom items and prints may take additional time to process.
If you really want these hook rails to look like they were made for your house or closet with a similar style and color, or you want them to have unique hook types… well, you’re going to need to make your own. And in this video, I’m going to show you how! So get ready and start thinking about the style and design you’ll want to make for your closet (or entry hall too!).

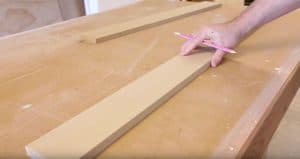
In my case, I decided to use some 1/2″ MDF that I already had laying around the shop. MDF is very easy to shape, doesn’t chip out on the router, makes for a super smooth finish when painted, and is all around easy to work with (except for all the dust it makes). I just cu out some various lengths on the table saw, all 3″ tall.

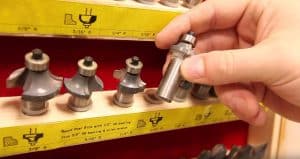
I wanted to go with a pretty simplistic look for mine, so I chose a 3/16″ round-over bit out of my router bit box. I set it to leave a slight edge all the way around for a little more decoration. It turned out really nice!

The type of hook you pick will partially determine how far apart you place them. I decided to go for coat hanger hooks, because my wife was planning to hang jewelry, scarves, and belts on them. That means I needed to place them about 3 1/2″ inches on center (2″ from each end). Multiplying the number of hooks by that number and then adding the ends determines the full length of the board. Since our house has all oil rubbed bronze hardware, I decided to by my coat hooks in oil rubbed bronze as well.

And that’s all there is to it! If you make this project please be sure to let me know and post some pictures of your project on The Geek Pub Facebook page for us all to see! Also, KipKay made some really cool closet hangers using old childhood trophies as the hooks! You can check out his video here: KipKay Trophy Coat Rack
In my lumber cart I found some sections of scrap 1/2” MDF that will work great for this project. Count out the number of hooks you’d like and then multiple that number by three and half inches. Add two inches for each end and then add it all together. That determines the length.
Using the table saw, I cut mine to three and a quarter inches tall, but you can make it any height that you like. Then I used my crosscut sled to cut it to length. Since I want these be decorative in addition to serving a function I used a 3/16” round-over bit on the router table to add a decorative design around the edges. You could use literally any of 100 different router bits to add an edge, so feel free to try something else! MDF is great for this kind of stuff because its hard to burn and doesn’t chip out on the router.
I covered my bench with painter’s paper and laid out the MDF for paint. It’s not a bad idea to do a little finish sanding with 220 or 320 grit sand paper before painting. MDF soaks up the paint so be sure to use paint+primer when painting it. Multiple lighter coats works better.
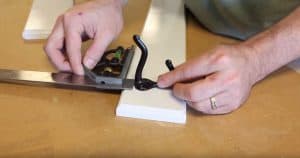
After the paint dries, lay them out on the table. Using a ruler make a tick mark at two inches and then again at ever three and a half inches. This is where we will attach the hooks. You can pick from any number of hooks at the local hardware store, so let your imagination run wild! I highly recommend using a punch to start the holes before drilling. Set the drill to a slower speed when drilling MDF.
Now just attach the hooks!
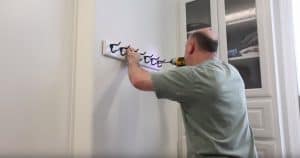
When you’re finished they should look similar to these! I made three different sizes for various walls in our closet. All that’s left is to use a level, drill some holes, and then attach them to the wall with screws. You can use the wall studs or sheetrock anchors.
And that’s it! We’re finished. You can hang all sorts of things on these hooks. Towels, scarves, belts, jewelry, and more! If you like this video, please hit the like button. I’d also appreciate a like on my Facebook page at Facebook.com/thegeekpub where you can keep up to date with me between videos!
Thanks for watching!
If you like our content maybe consider upgrading to Premium. You’ll get access to