Blog
ADS-B Using a Raspberry Pi Flightradar24
If you’re not familiar with Flightradar24, you should be! It’s a fantastic service that tracks flights all over the world using ADS-B data. You can track ADS-B using a
Tracking ADS-B Using a
 Parts List for this Project
To help you get started, here’s a quick parts list for this project:
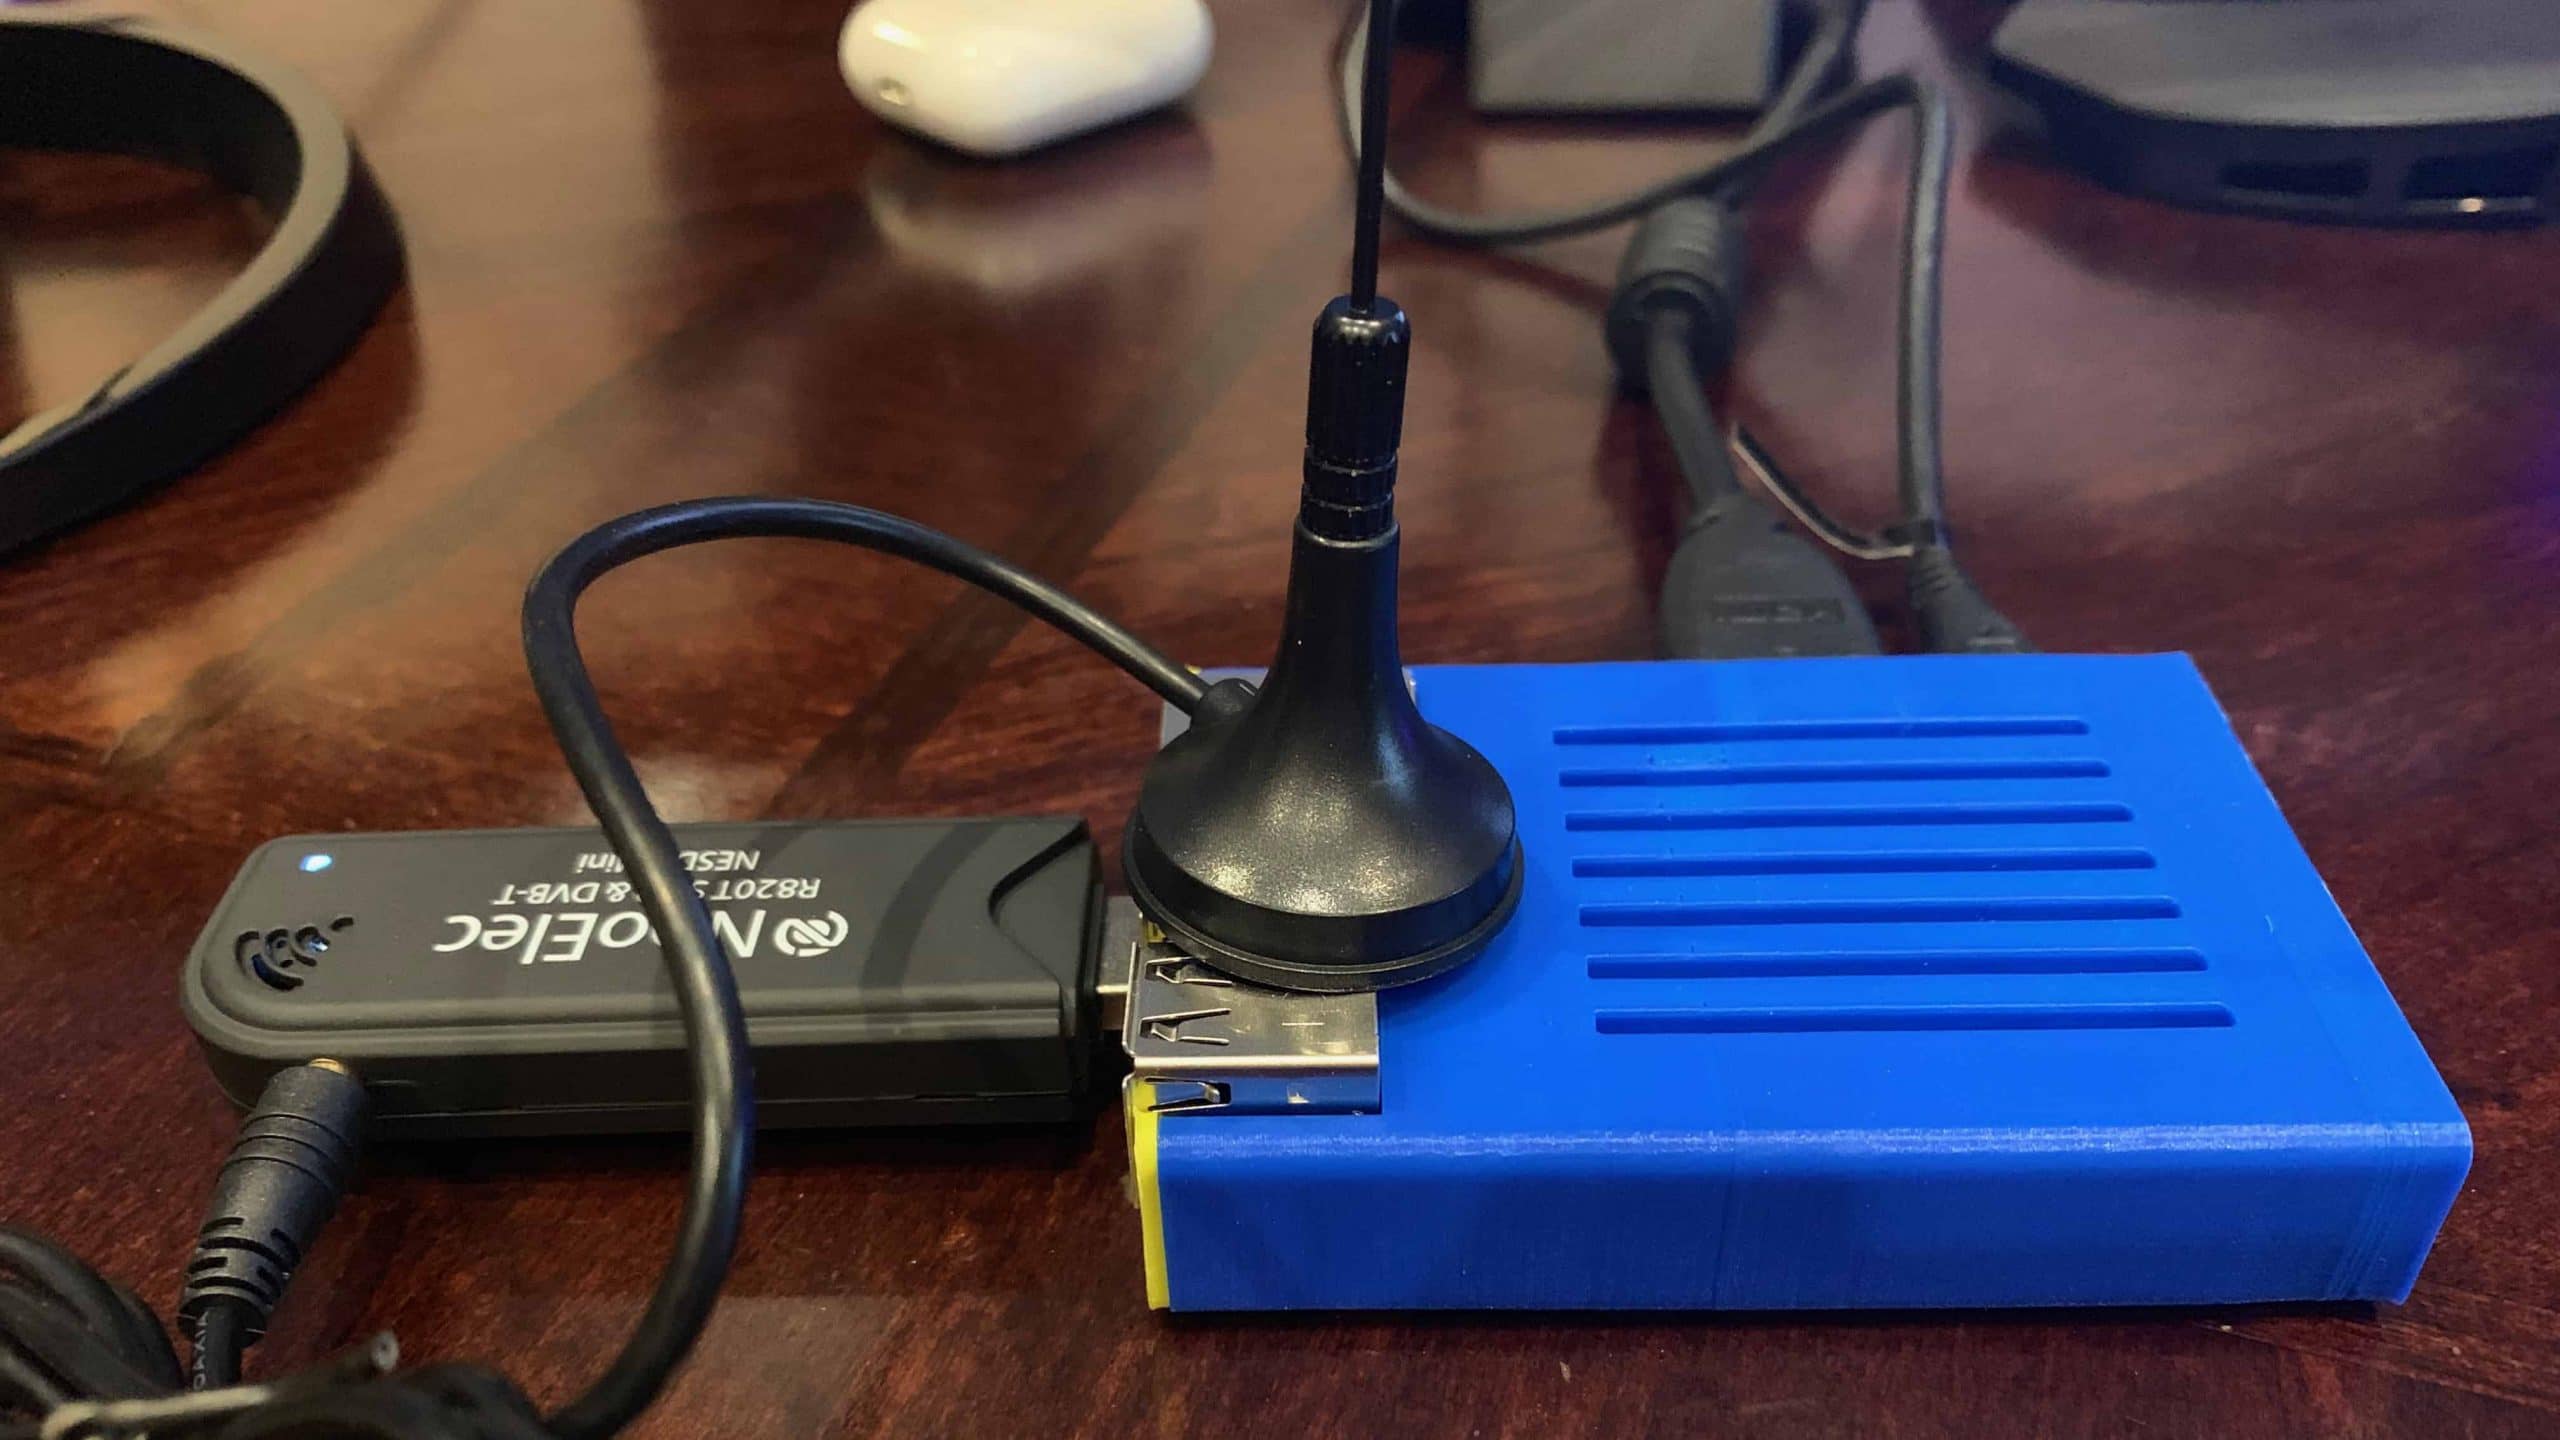
- Raspberry Pi 3 Model B+
- Micro-SD Memory Card
- Raspberry Pi Power Supply
- Raspberry Pi Case
- Mini DVB-T Digital TV USB Dongle
ADS-B Using a Raspberry Pi Flightradar24
So let’s walk through the steps of setting up a
Get a Flightradar24 Account
First things first, you’re going to need a free Flightradar24 account. For now just sign up for the free account. It’s all you need to get started.
Install the Flightradar Pi24 Image on your Micro-SD Card
There are two ways to install Flightradar24 services on your
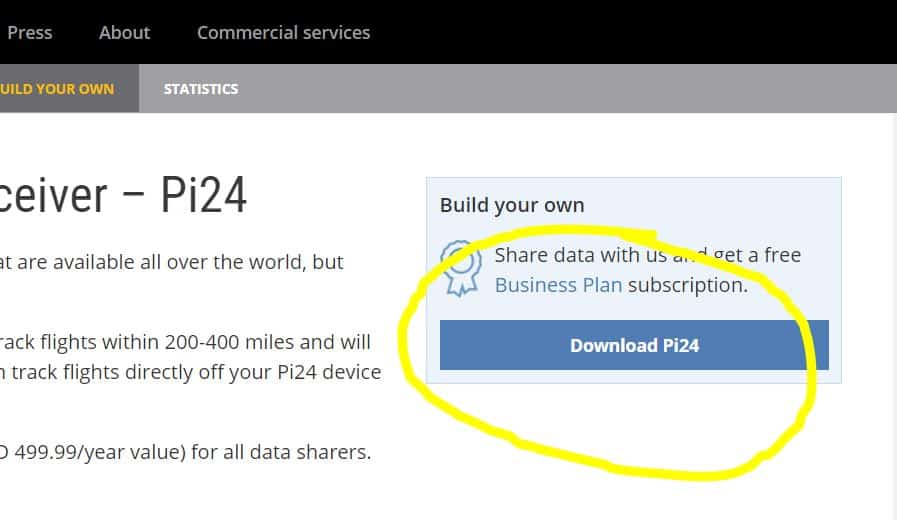
Step 1: Download the latest Pi24 image from Flightradar24.
Step 2: Download and install Balena Etcher on your Mac or PC if you don’t already have it. Etcher is the simplest way to flash your Micro-SD card. There’s even a version for Linux desktops too!
RELATED ARTICLE: Boot a Raspberry Pi without an SD Card
Open Ethcher and select the image you downloaded from Flightradar24.
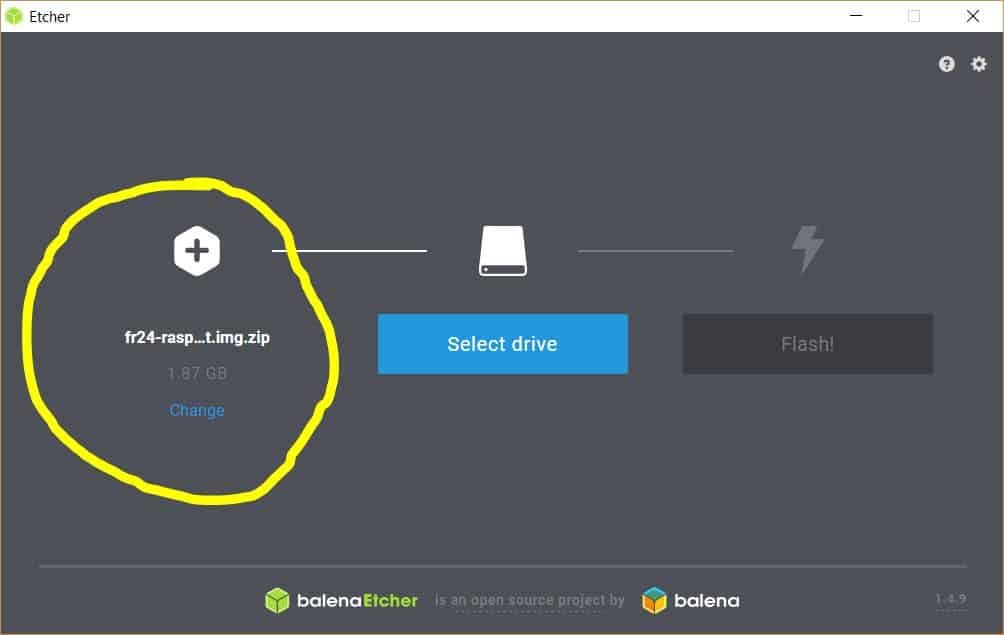
Now select your micro-SD card as the destination drive.
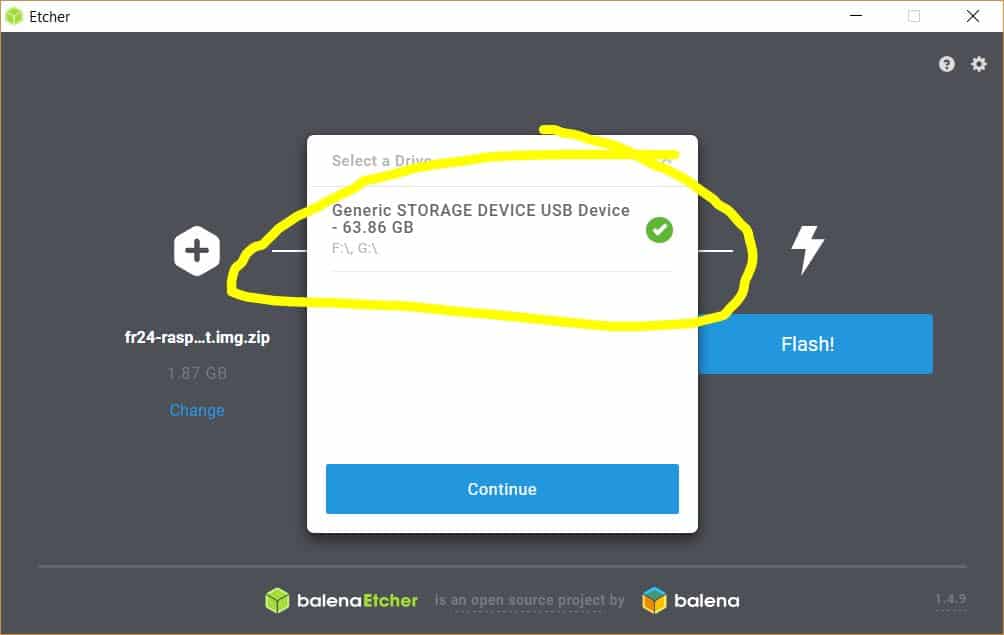
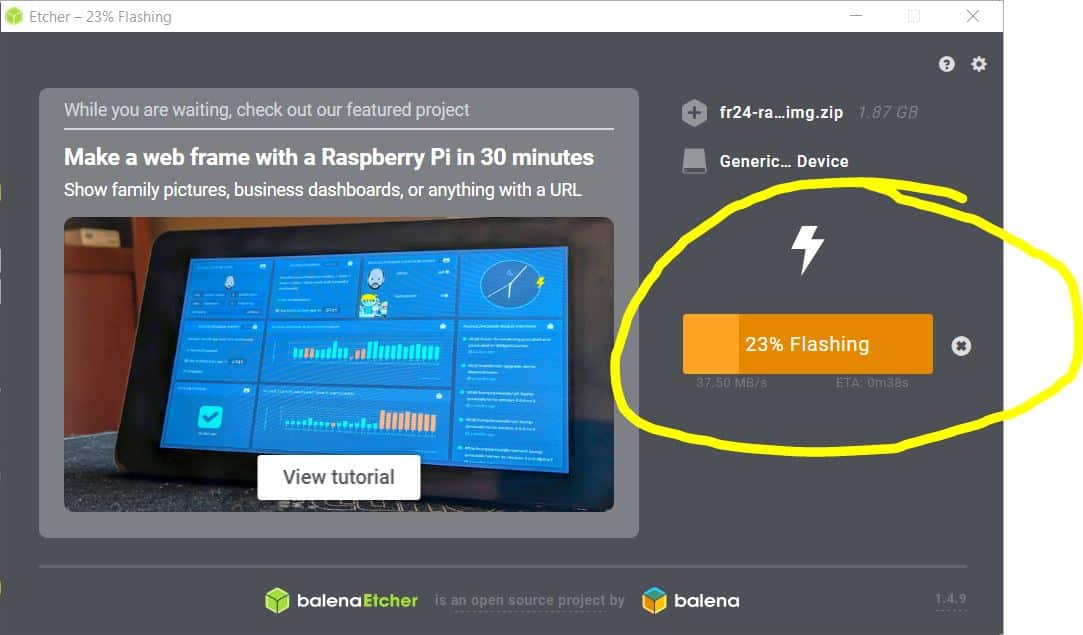
And finally, click the ‘Flash!’ button to begin the imaging process. Balena Etcher is free, so it will show you some advertisements in the window while the flash in progress.
Step 3: Eject the newly Pi24 imaged micro-SD card from your computer, place it in your
Step 4: Make sure you have an Ethernet cable attached to your
Step 5: Open a new terminal window and enter the following command:
[code language=”bash”]
sudo fr24feed –signup
[/code]
Now skip to passed the next section to the Flighradar24 configuration section of this article to proceed!
Installing FlightRadar24 on an existing Install of Raspbian
If you’d prefer not to use the Pi24 Flightradar24 image and instead install Flightradar24 services on Raspbian yourself, just follow these simple steps.
Step 1: Enter the following command to install the required Flightradar24 services.
[code language=”bash”]
sudo bash -c "$(wget -O – http://repo.feed.flightradar24.com/install_fr24_rpi.sh)"
[/code]
Step 2: You will be asked some questions by the Flightradar install, proceed to the next section before answering them.
Configuring Flightradar24 on the Raspberry Pi
Now we’re ready to start configuring the Flightradar24 services on your Pi.
Email Address: This will of course be the email address you signed up to the Flightradar24 website.
FR24 Key: Since this is our first time using Flightradar24, we won’t have a key. Leave this blank.
MLAT Calculations: You will answer yes for this question.
Latitude & Longitude: You will need to enter the Latitude and Longitude of your location. If you don’t know it, you can find it using this site.
Altitude: You need to enter your altitude. For Flightradar to have accurate results we need to know how far above sea-level we are. If you don’t know your altitude, you can find it using this site.
Receiver Selection: Select 1, since we’re using the DVB-T USB stick.
Dump1090 Arguments: Leave this question blank.
Raw Data Feed: Enter no here.
Basestation data feed: Enter no here.
Logfile mode: Select 48-hour, 24 rotation for this question.
Logfile path: Leave this blank and press enter.
Finishing the Flightradar24 Setup
Now that we’ve completed the questions, its time finish the configuration and start sending data.
Step 1: You’ll be presented with a Flightradar24 sharing key. Write this key down. You may need it in the future.
Step 2: We’re ready to start tracking ADS-B Using a
[code language=”bash”]
sudo systemctl restart fr24feed
[/code]
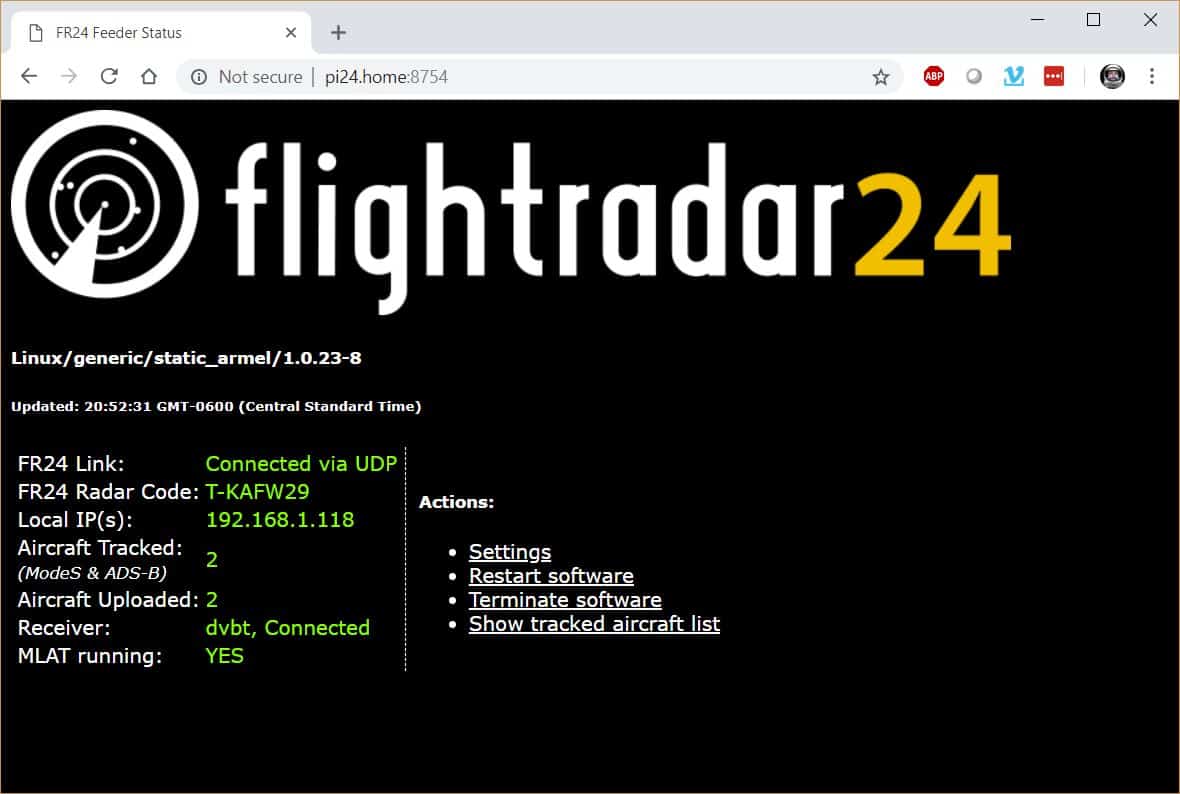
You can verify this worked and check the status using the following status command. You should also be able to see your feed show up in the data sharing page on the Flightradar24 website.
[code language=”bash”]
fr24feed-status
[/code]
To see the local status of your Pi24, just go to its web page by browsing to it in your browser. If you don’t know the IP address of your Pi24 you can get it by typing Hostname -I in a terminal window. In my case its http://192.168.1.105/
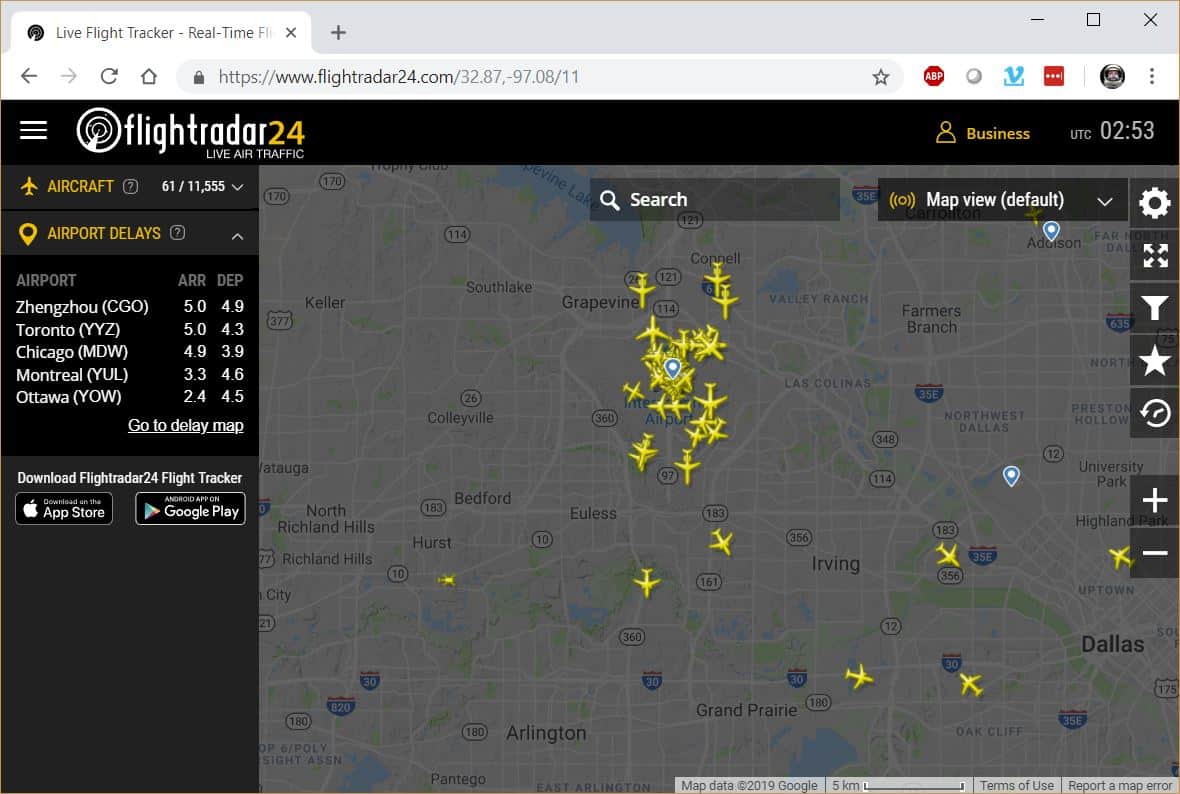
That’s all there is to it! You’re now sharing flight data with the Flightradar24 service on your own custom built Pi24 box! Congratulations and welcome to the team!
Feel free to leave a comment below with your results!


I imagine that antenna placement is important? The most convenient place for me to put something like this is the center of my wood-frame-no-radiant-barrier house. Would it be better to figure out a way to move it near a wall or higher in the house (or get an extension for the antenna)? Or does the signal travel decently well through a “normal” house?
Remember these are digital signals much like TV and FM Radio. They’ll pass through normal walls pretty easily. But of course line of sight is much better. Having the antenna outside would be better when possible.
could you please recommend a best economical Raspberry Pi for flight radar 24 access
There’s a parts list recommendation at the top of the article.
Sir, actually i am asking to send me a link so that i can buy it. i am not familiar with Raspberry Pi. I need this now only to use in Flightradar24. thanks
Again, there is a link to buy the Raspberry Pi at the top of the article under “PARTS LIST FOR THIS PROJECT”.
shall i need an ethernet cable for internet access or it has a wif inbuilt in Raspberry Pi 3 Model B+?
thanks..
Please reply.. also PI3 or PI4 is better
i am getting below error Trying to install software for Pi 3 b+ and am getting error message gpg: keyserver receive failed: Server indicated a failure
Hit:1 http://archive.raspberrypi.org/debian buster InRelease
Hit:2 http://raspbian.raspberrypi.org/raspbian buster InRelease
Reading package lists… Done
Reading package lists… Done
Building dependency tree
Reading state information… Done
dirmngr is already the newest version (2.2.12-1+rpi1).
0 upgraded, 0 newly installed, 0 to remove and 74 not upgraded.
Executing: /tmp/apt-key-gpghome.UQnEdW9kTE/gpg.1.sh –recv-key –keyserver pool.sks-keyservers.net 40C430F5
gpg: keyserver receive failed: Server indicated a failure
Executing: /tmp/apt-key-gpghome.325MzvmuVS/gpg.1.sh –recv-key –keyserver pgp.mit.edu 40C430F5
gpg: keyserver receive failed: Server indicated a failure
Just run it again. Mine failed on the first attempt as well. Am now pushing data up, but only 14 nautical mile range so far. Would like to consider a large antenna to increase my range.
Hi, I know the parts list recommends a Pi3B+ but will this project work with a Pi2B? Thanks.
Great article. Really helped me get going quickly.
I’m unclear on a couple of points though. Is there a graphical menu that comes with this image? I found this much more convoluted than getting going with FlightAware on the same Pi. Ad can I configure the dump1090 display I can pull out of the running Pi? What I see so far is quite lacking.
Loaded flightradar24 on my pi4. I’m using a Logilink VS0002A for the dvbt. As per below status output it reports the receiver as down and MLAT not running. Any suggestions as to what the problem might be and what I should check?
pi@raspberrypi:~ $ fr24feed-status
[ ok ] FR24 Feeder/Decoder Process: running.
[ ok ] FR24 Stats Timestamp: 2020-04-27 23:56:16.
[ ok ] FR24 Link: connected [UDP].
[ ok ] FR24 Radar: T-CYOW88.
[ ok ] FR24 Tracked AC: 0.
[FAIL] Receiver: down … failed!
[FAIL] FR24 MLAT: not running … failed!
I have the same problem, how did you fix it?
I built this project with the NooElec antenna and get about 900 aircraft a day, most within 100nm. My antenna is sitting in a south facing window and mostly “sees” south. Thinking about going with an outdoor antenna, but know little about ADS-B, FlightRadar24, and Pi Computers, I’m reluctant to just buy an antenna that says ADS-B for Flightaware, and think that I can plug and play. Would an antenna like this the FlightAware 1090MHz ADS-B Antenna + 25 Foot Cable + PRO USB Stick Plus from Flight Aware work on this setup? Or can you recommend a suitable alternative?
Just saw some action on this site, so I thought that I should follow up on my antenna question above. Any recommendations?
Will this work on a pi zero w?
0.5