Blog
Wiring WS2812b Addressable LEDs to the Raspbery Pi
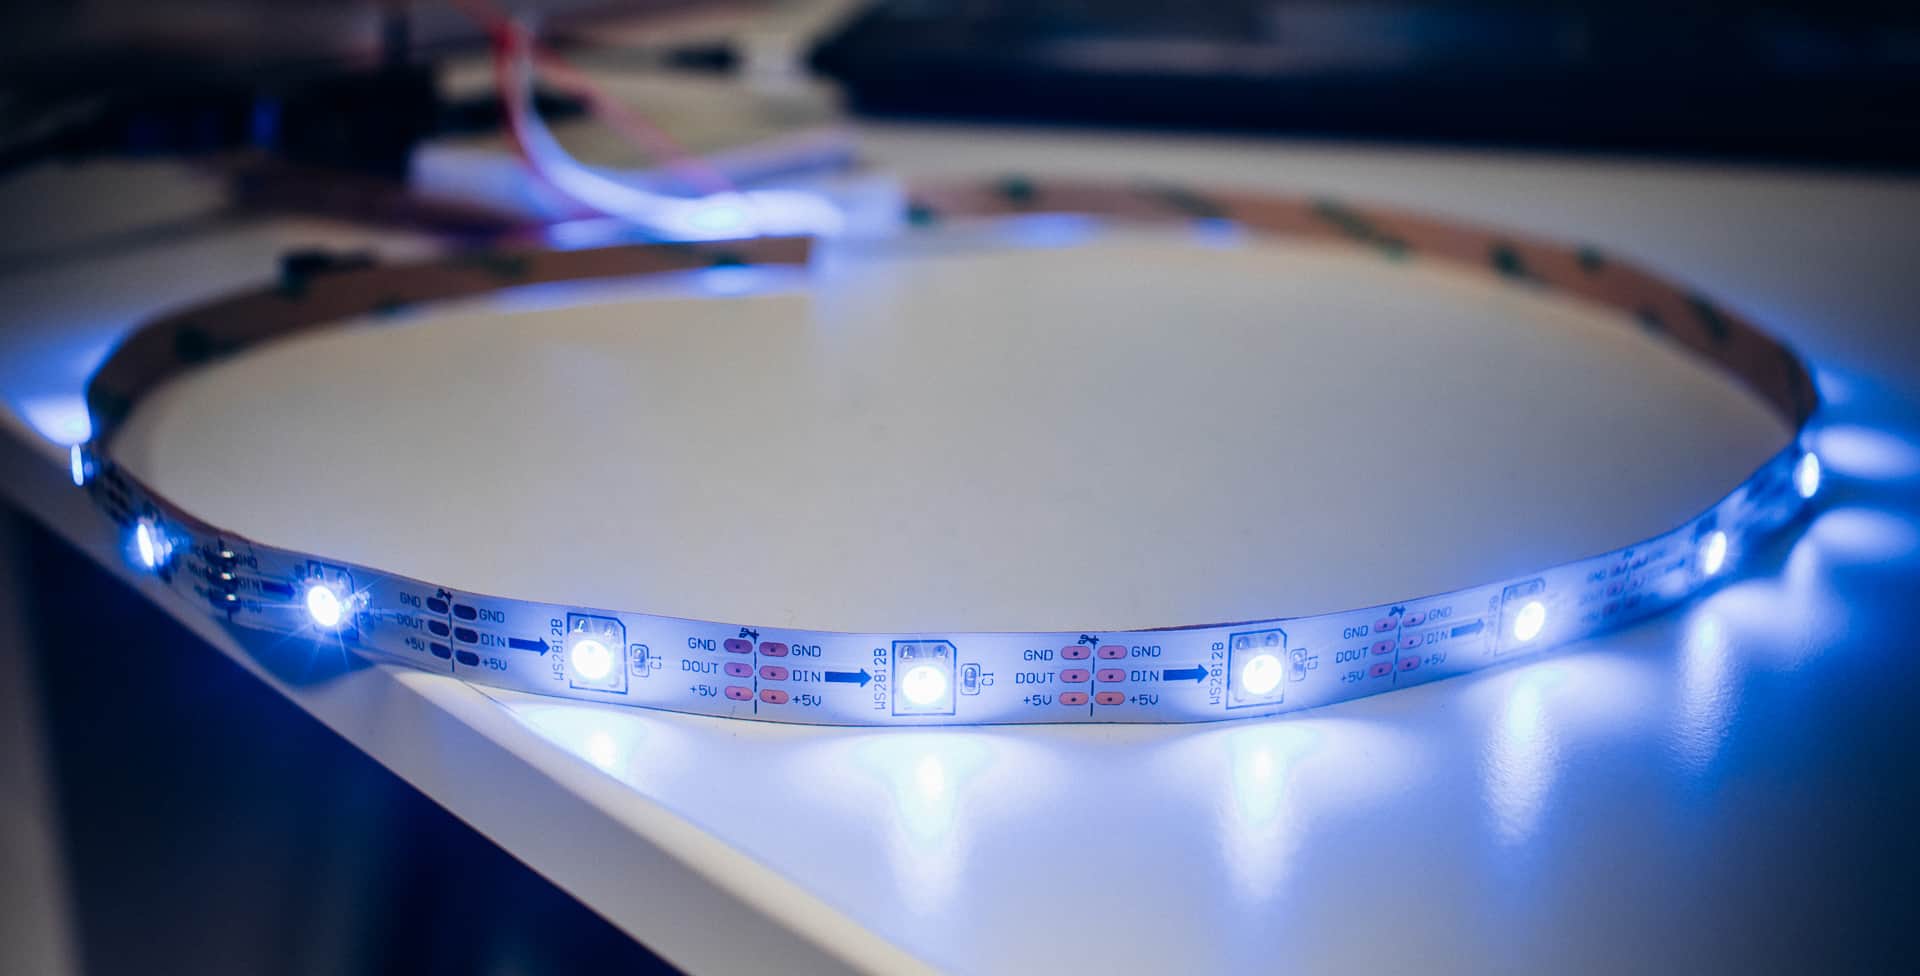
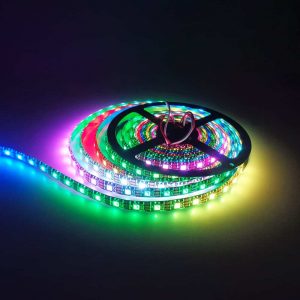
I don’t know where I have been recently, but I stumbled across one of the greatest inventions of all time recently: Addressable LED strips. Addressable LED strips, sometimes known as NeoPixels, or by various numbers such as WS2812b LED strips are LED lighting strips where each individual LED can be controlled via a specialized lighting controller -or- an Arduino or a
Wiring the WS2812b to the Raspberry Pi
If you’re new to
- Raspberry Pi 3 Model B+
- Sandisk 64GB SD Card
- Raspberry Pi project board
- Logic Level Converters
- WS2812b LED strip
- LED Power Supply
First, before we get to the main topic, lets understand a few things and make some of these topics clear.
Addressable LEDs vs Regular LEDs
Regular LED lighting generally has only two states. Either all of the LEDs in the chain are on, or they are all off (although some LED lighting before WS28xx variants were dimmable). Addressable LEDs work by adding a small micro-controller to each LED. This micro-controller allows for each individual LED to be controlled separately for state (on/off) and brightness via PWM. When integrated into an RGB LED it also allows for the control of each LED’s color!
Raspberry Pi and Arduinos
Options for Wiring the WS2812b to the Raspberry Pi
There are multiple options for wiring WS2812b to the
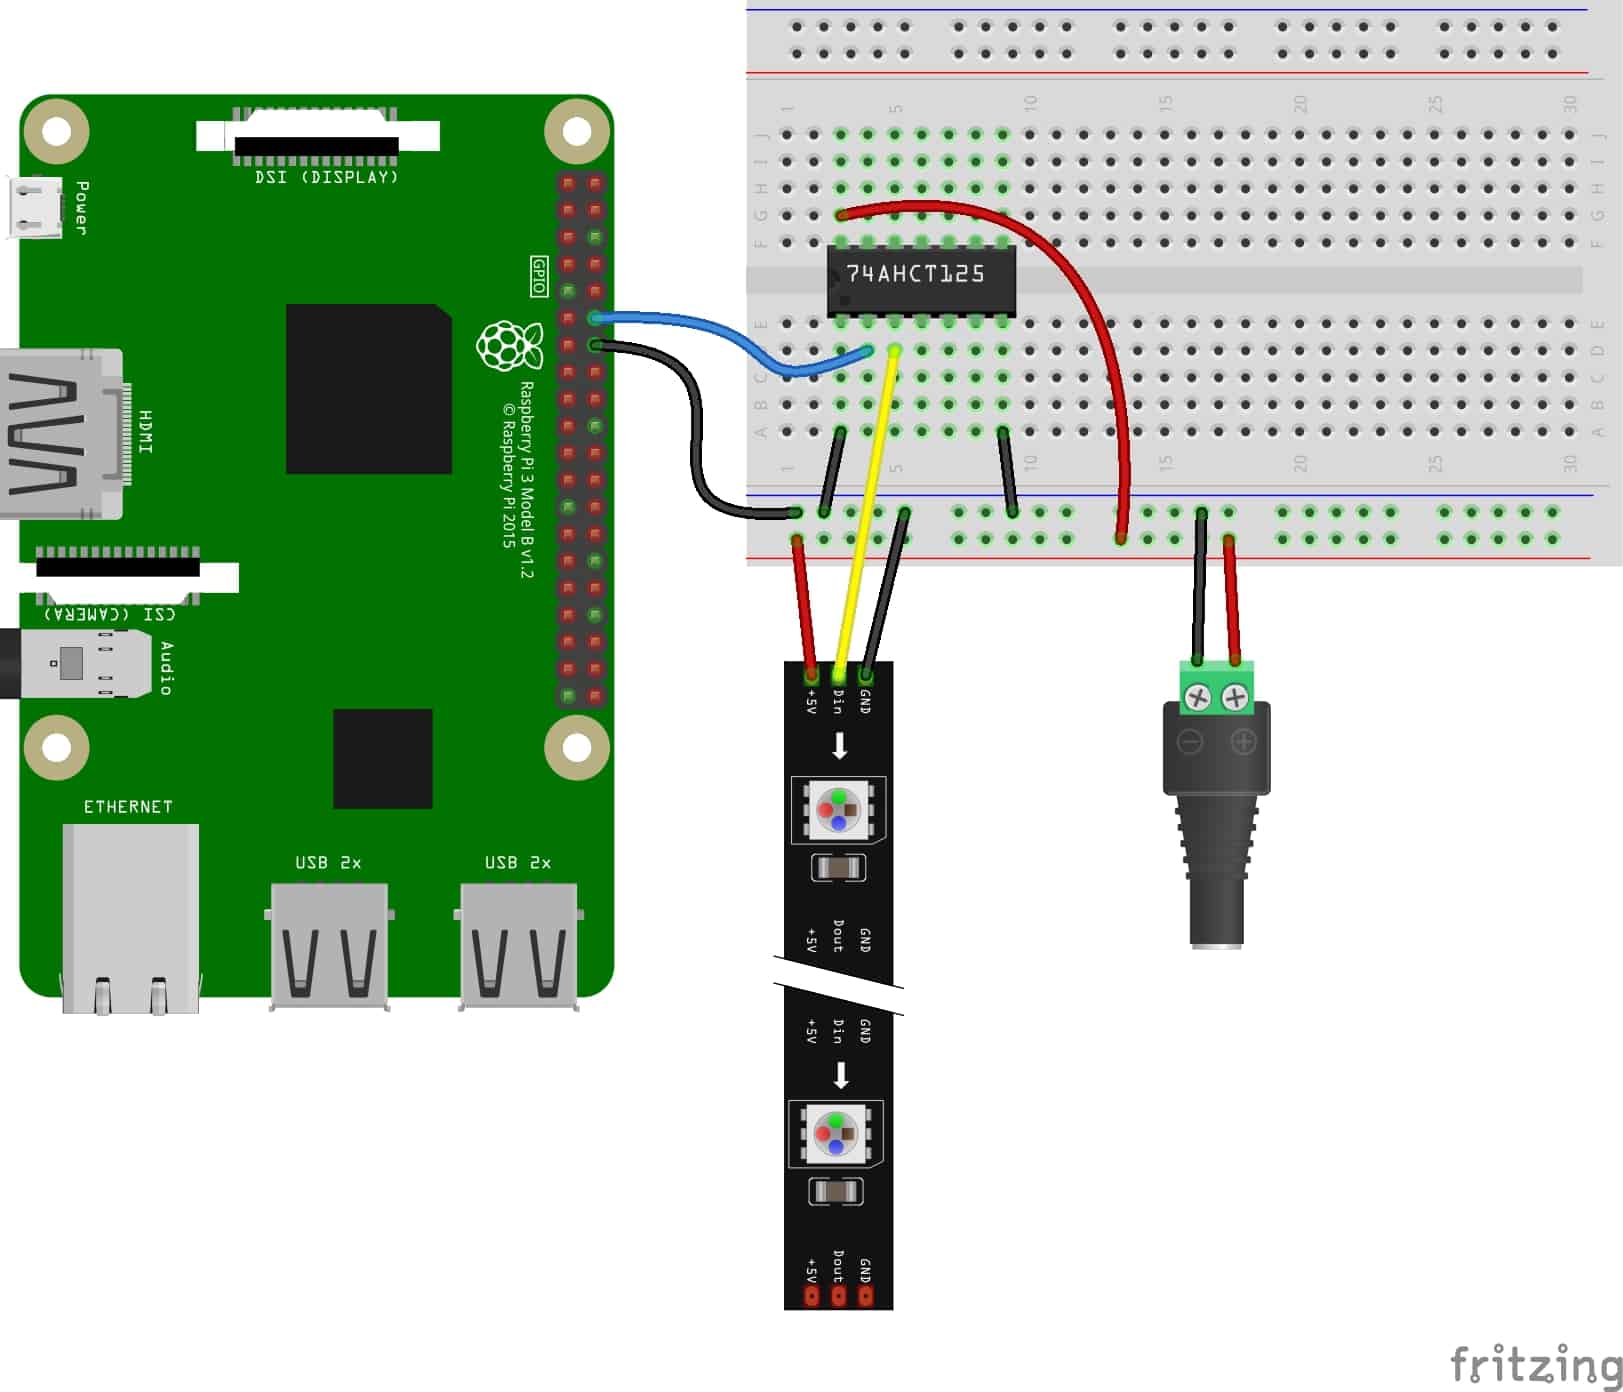
WS2812b Raspberry Pi Wiring Using a Level Shifting Chip
One simple way to connect the WS2812b to the
Raspberry Pi GPIO pin 18 to 74AHCT125 LLC pin 1A- 74AHCT125 LLC pin 1Y to WS2812b Data In (DIN)
- Power supply ground to 74AHCT125 LLC ground
- Power supply ground to 74AHCT125 LLC pin 1OE
- Power supply ground to Pi ground (GND)
- Power supply ground to WS2812b ground (GND or -)
- Power supply 5V to 74AHCT125 LCC VCC (or +)
- Power supply 5V to WS2812b 5V (or +)
Raspberry Pi Wiring with Diode
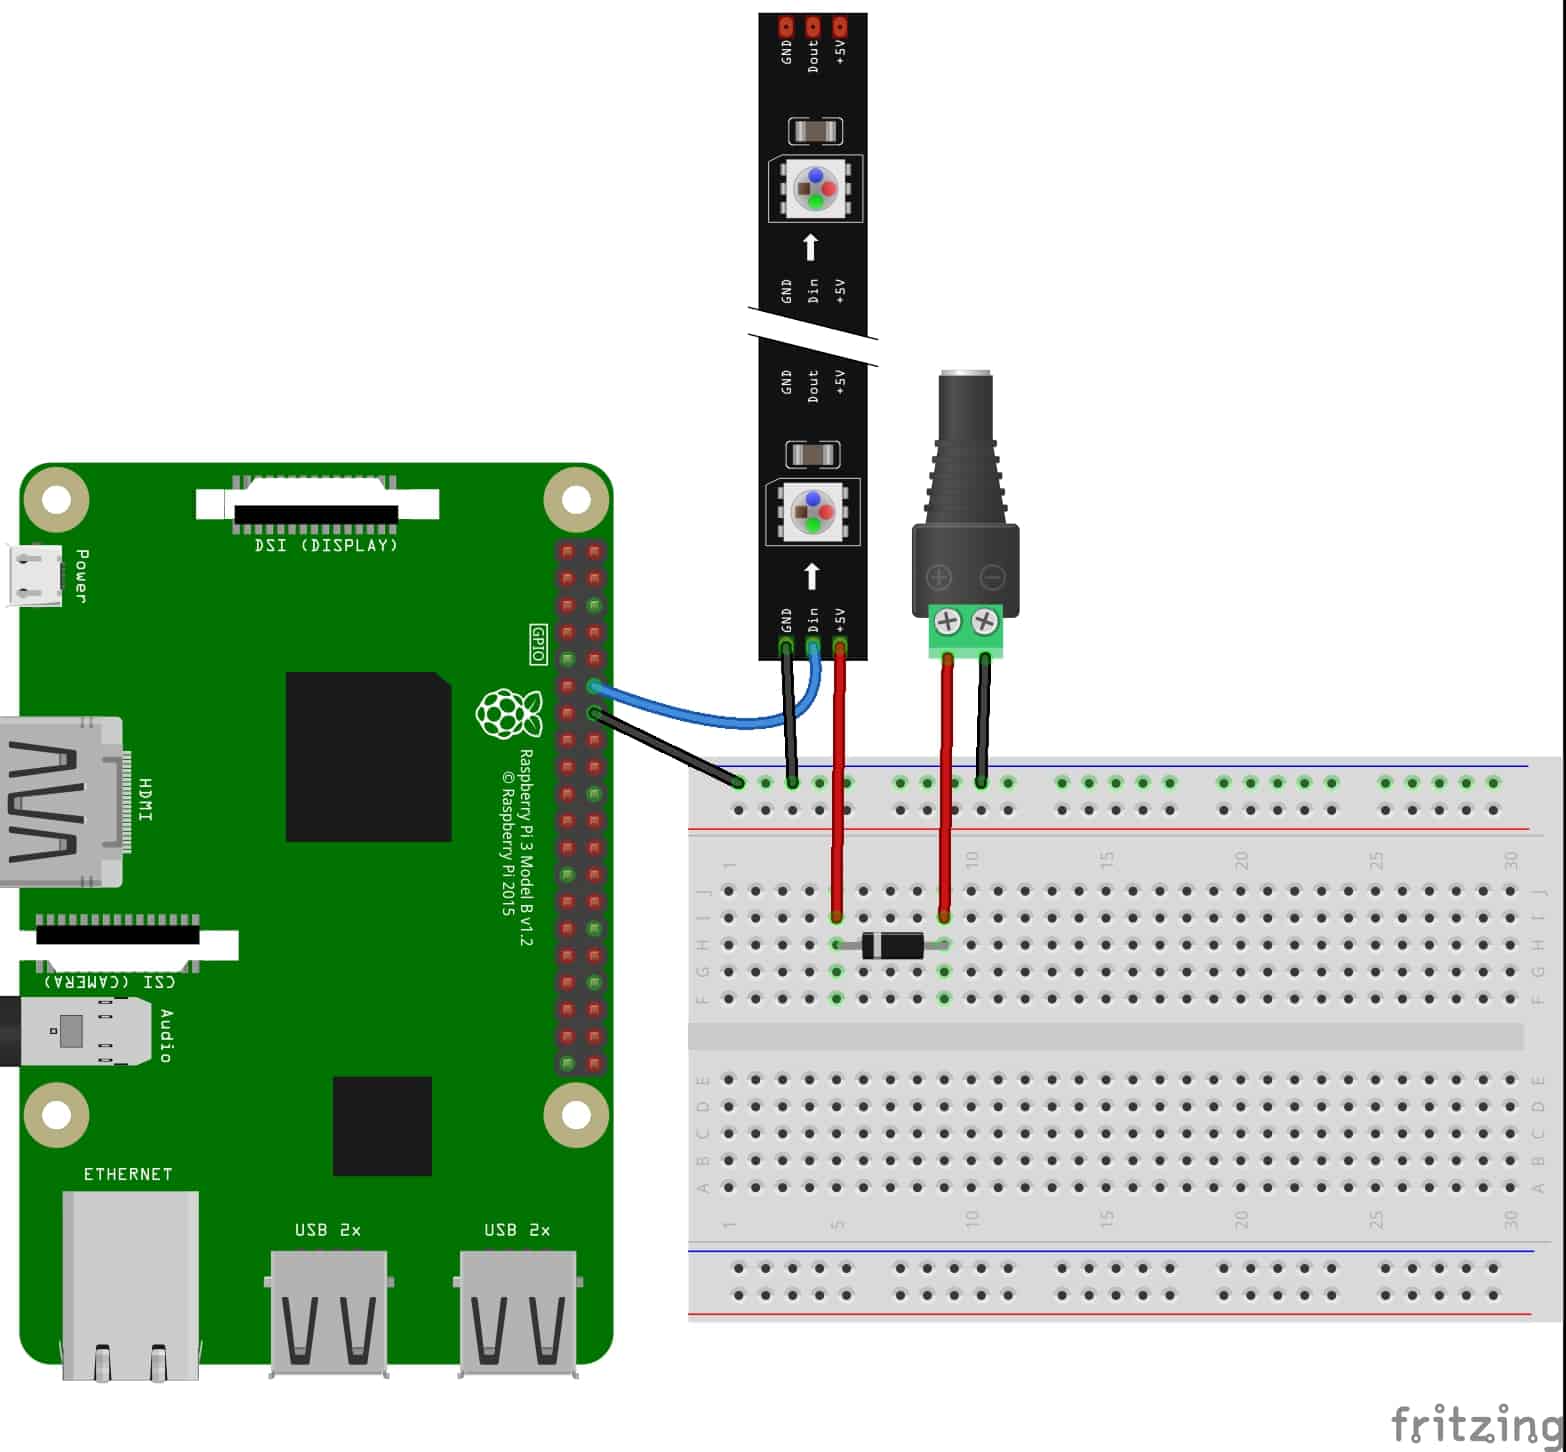
Another option to isolate the PI and protect it is to use a diode. This would be wired as follows:
Raspberry Pi GPIO pin 18 to WS2812b Data In (DIN)- 1N4001 diode cathode (side with the stripe) to WS2812b 5V (or +)
- Power supply ground to
Raspberry Pi ground (or 0) - Power supply ground to WS121812b ground (GND or -)
- Power supply 5V to 1N4001 diode anode (side without the stripe; make sure to get the orientation of the diode correct, with the cathode (side with the stripe) otherwise you may damage the Pi)
Using External Power Source without Level Shifting on the Raspberry Pi
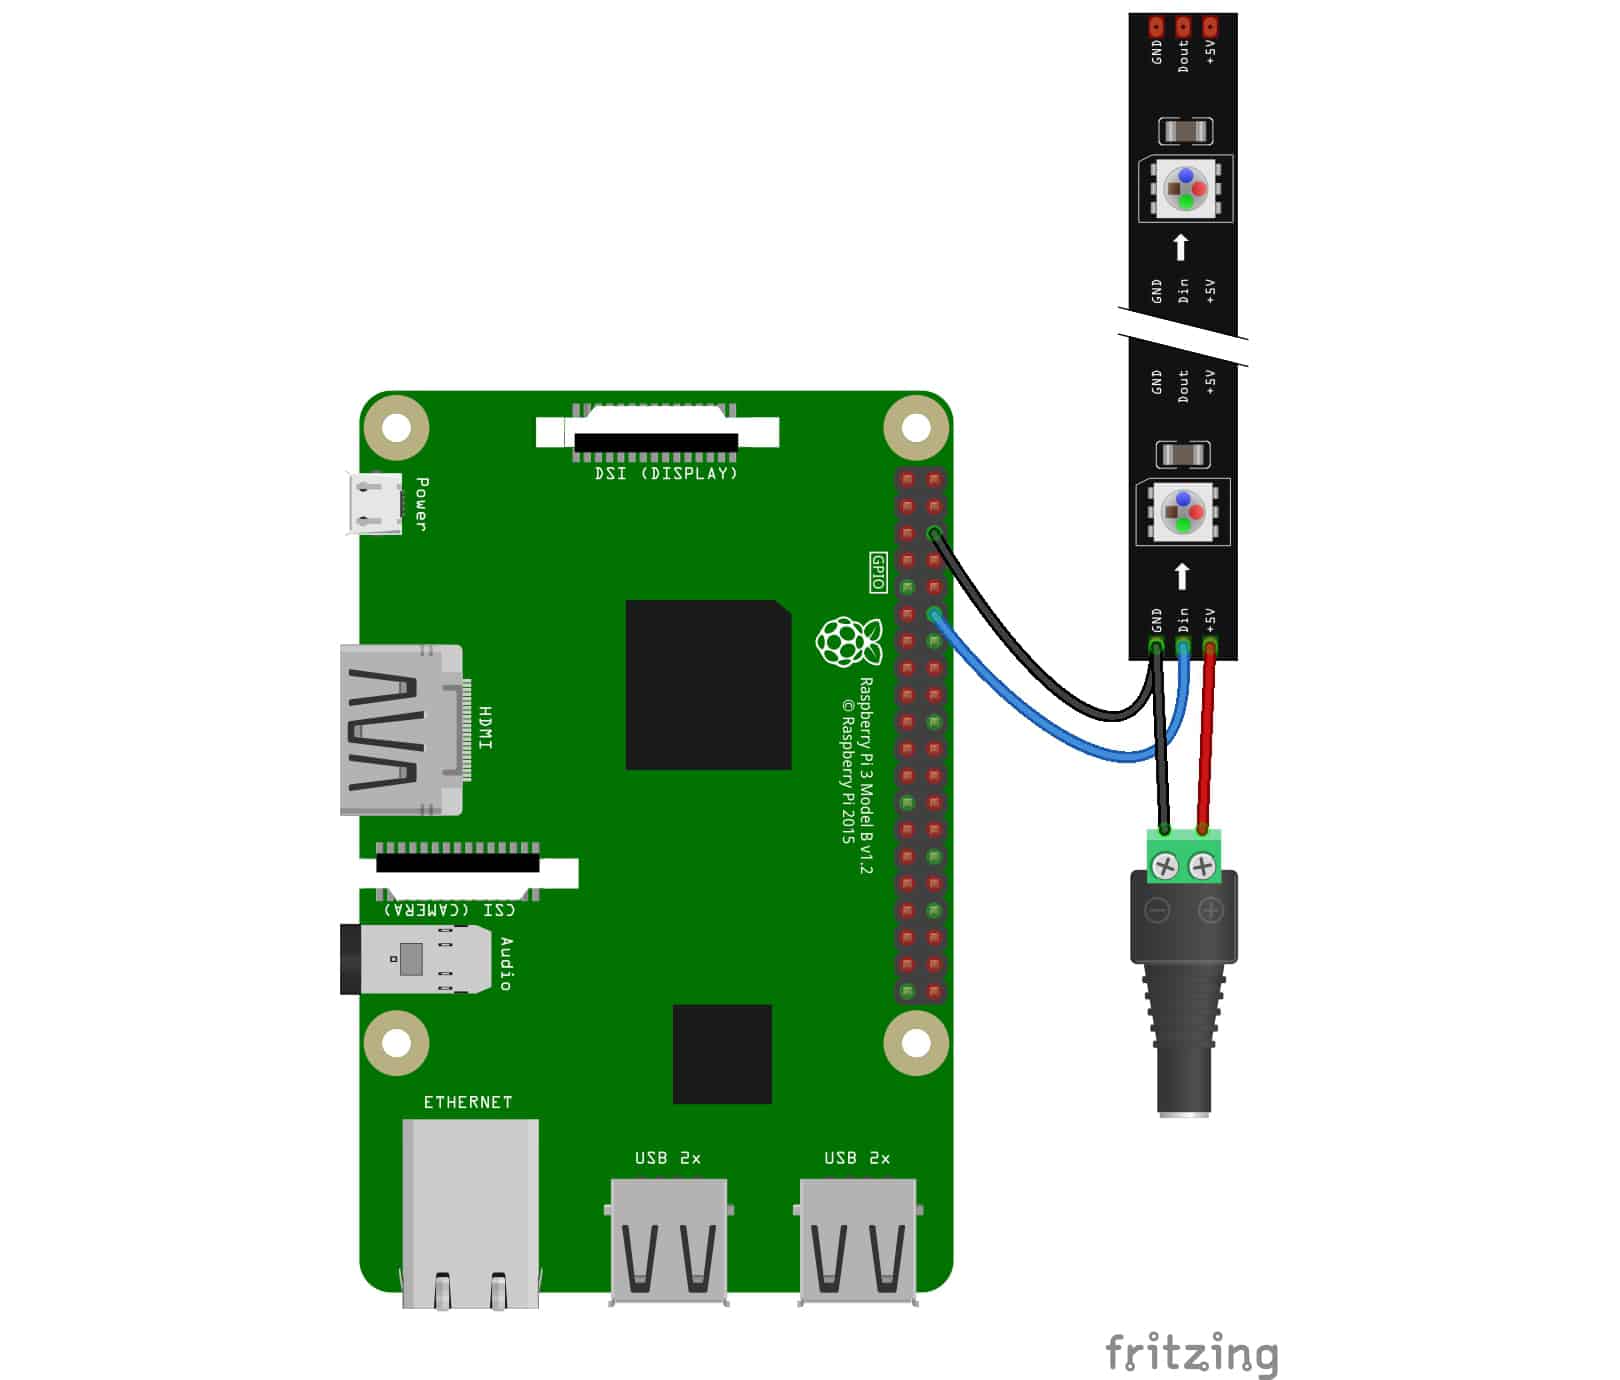
It is possible in a pinch to operate WS2812b LED strips without level shifting at all. I don’t recommend it, but in most cases if you’re careful you’ll be fine. However, there are some WS21812b LED strips that simple will not work without a level shifter. If you run into trouble you’ll need to add one. Without a logic level shifter it would be wired like so:
Raspberry Pi ground (GND) to WS2812b ground (GND or -)Raspberry Pi GPIO pin 18 to WS2812b Data In (DIN)- Power supply ground to WS2812b ground (GND or -)
- Power supply 5V to WS2812b 5V (or +)
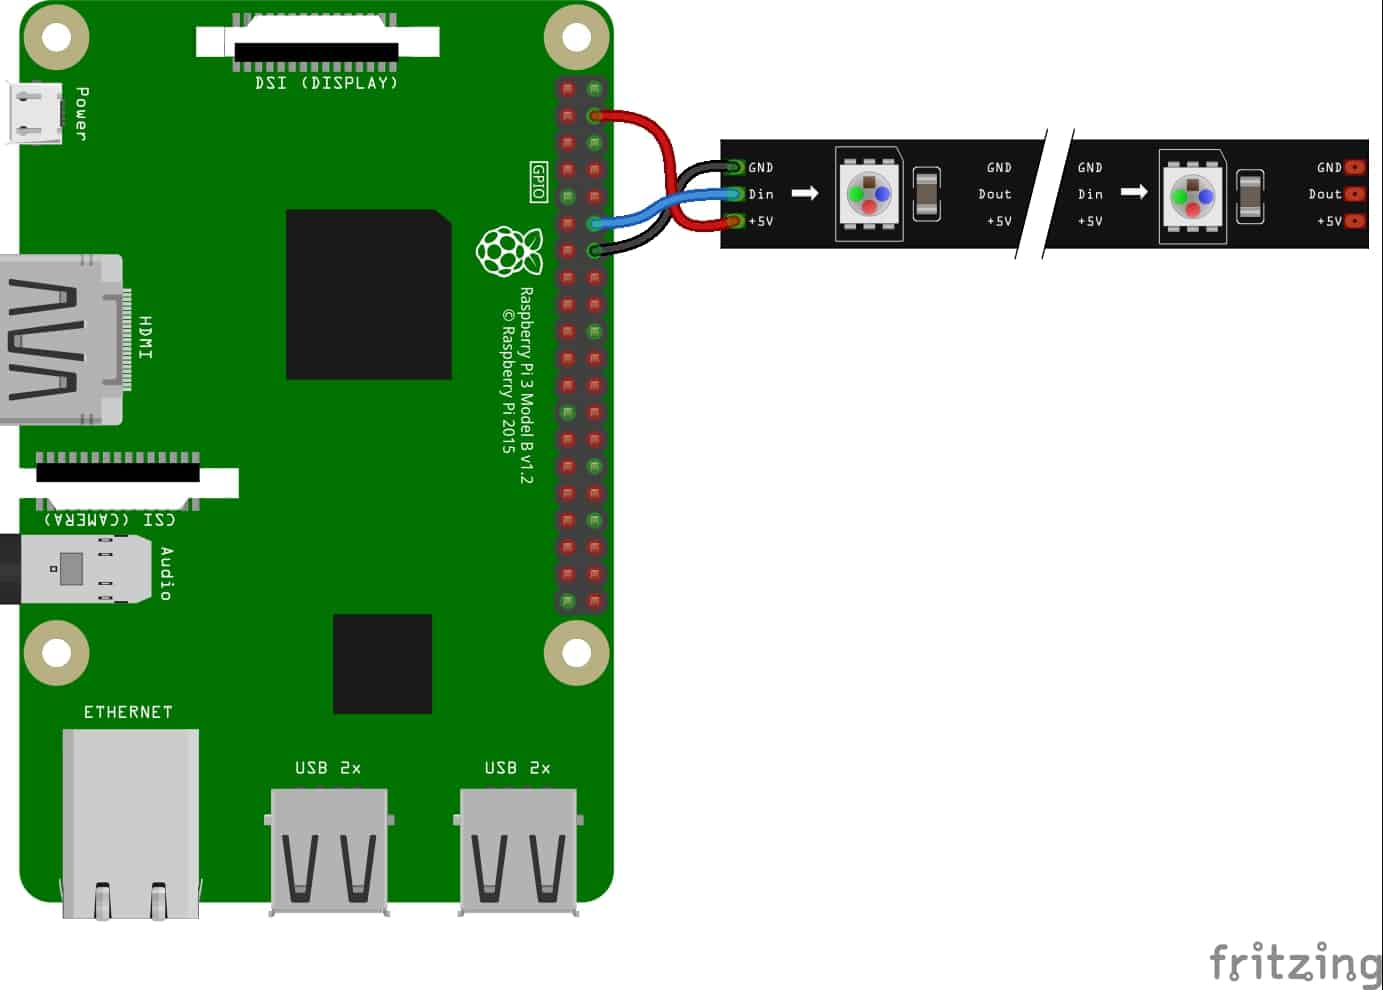
Powering WS2812b directly from Raspberry Pi Without Level Shifting
The last option will only work with a small number if LEDs. Check the specifications on your addressable LED strips to make sure how much current is required and be sure not to exceed the number of LEDs that add up to the
Raspberry Pi 5V to WS2812b 5V (or +)Raspberry Pi GND to WS2812b ground (GND or -)Raspberry Pi GPIO pin 18 to WS2812b Data In (DIN)
Next Steps
Of course, wiring ws2812b to the








2.5
“It is possible in a pinch to operate WS2812b LED strips without level shifting at all. I don’t recommend it, but in most cases if you’re careful you’ll be fine.”
I am a total noob in electronics and am inclined to use this option, but now you scared me. Why don’t you recommend this way? What could go wrong here?
Excellent writeup, the wiring diagrams are helpful as well!